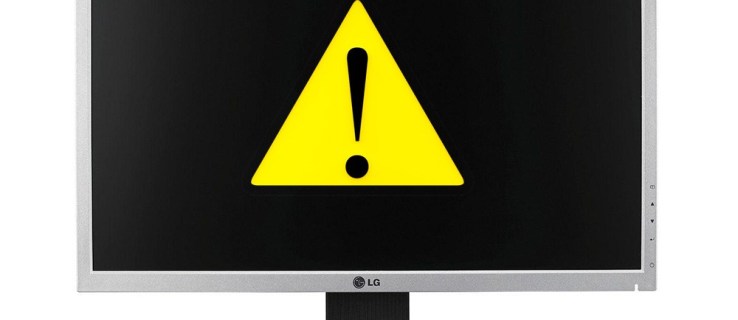
Have you disabled your machine’s main graphics chip?
What are you experiencing?
It is definitely going to show you a black screen. The reason is because the hardware that sends visual data to the screen gets inactive and the whole system fails. It is nothing related to the hardware but solely due to the software issue. The error can be corrected by resetting the CMOS which is actually designed to take care of the BIOS.
Table of Contents
Fixing The Graphics Card That Is Disabled
It’s possible for an issue with a graphics card to prevent a computer from starting up.
After removing the faulty graphics card you may then find that the computer starts up successfully but there is still no output to the display using the motherboard graphics.
The term BIOS is the acronym for Basic Input/Output System. It is known to be the firmware on a chip that is used to read first during boot. It is like a guiding tool to let you know how to handle different hardware on the system.


The Complementary Metal Oxide Semiconductor (CMOS) is used for short-term memory. It guides the BIOS about the actions that you need to take at the time of computer start up. It is available in the RTC clock semiconductor. It is essential to remember that in some cases there is a separate chip in the motherboards.
Resetting the BIOS
Here are two different options to manage resetting the BIOS
Resetting The Bios With A Switch On The System
Most of the motherboards are fitted with a CMOS reset switch. It is used to disconnect the backup battery’s power to the BIOS. The switch works like a pin-and-plug setup. If there is a reset switch on the board it becomes easy to reset your CMOS and BIOS configuration. The switch comes with multiple pins either two or three.
- Disconnect the plug. Wait for at least 20 seconds by pressing and holding the plug. It is a three pin switch, separate it and then place it on the outer pin on the opposite side. You need to press and hold it for 20 seconds too.
- Reinsert the plug whether two or three pins back to their respective places.
After you remove the plug from the pins the BIOS no longer retains the settings and goes back to the default settings. There is no need to panic as removing the plugs will not impact upon any of the files or the OS data. All that happens is that the system will go back to the standard start up settings.
Resetting Bios By Removing The Cmos Battery Of Your System
CMOS gets all its power from a small battery that is not bigger than the nickel. The battery removal is therefore the second option in correcting the BIOS.
Desktop CMOS Battery Removal
- If you are using the desktop PCs, CMOS battery removal is comparatively an easy task to handle. It is essential to shut off the computer and then remove all the cables. Open the case to have a closer look at the hardware. If you have never done this before you can check the user manual. The manual will guide you successfully but at the same time you may void your warranty.
- After finding the internal components you can look for the battery that looks more like a large watch battery. It can be found next to the motherboard. As you open the housing the battery will pop out before you. All you have to do is disengage it by unclipping it.
- Once the battery is removed press and hold the power button for about 15 seconds. This will let you get rid of residual power in the motherboard. By doing so you are actually giving CMOS enough time to adjust to the defaults.
- Reinsert the battery properly.
- Reseal the casing and reboot. The BIOS will reset itself and enable your internal graphics.
Laptop CMOS Battery Removal
If you are a laptop user then it is really hard to access and remove the CMOS battery. If you have a laptop with a pop up tray on the chassis that makes it really easy to remove the battery. The others do not have this choice.
There are several styles and brands of the laptop available on the market that you can choose from. Depending on their individual qualities it is really hard to find a general manual with all possible guidelines. If you think that finding a tutorial for each of them is hard you can simply make it to your trusted repair shop. Make sure that you have briefed the repair shop owners about the possible problem so they can correct it accordingly.
Other Solutions
If you have not found the above methods successful then there is no need to worry as the alternative methods are waiting for you too.
Safe Mode Boot
Start working with the system by going for the option of booting in Safe Mode. You can choose the option by simultaneously pressing the Shift and F8 key during startup. Once the screen starts working you can start with the driver update too. It becomes possible to restore the factory settings as well. Thus, if you feel that the problem is due to the software this will resolve the problem.
If you are booting the system for the first time but you cannot see the display then this means there is a serious problem in the queue waiting for you. The boot screen cannot be controlled by the OS. If despite doing all efforts you cannot correct it it means there is a problem with the cable or the graphics cards.
Connecting the Video Cable and the Onboard Graphics Card
For the desktop user the solution rests in connecting to the onboard graphics card that comes with the motherboard. All you have to do is connect your HDMI or VGA cable and the onboard slot.
Cleaning And Maintaining Computers
Computer cleaning is very important just like any other gadget such as digitogy. Open the casing after a few days to check and clean the debris accumulating over the parts. If the dust and debris keeps accumulating on the motherboard you may have to face the rest interfering with the signals. Thus, the electrical signals will not be transmitted smoothly to the different components.
Connecting With The Manufacturer
It is important to stay connected with the manufacturers to learn all about the right ways to handle the problem. The information regarding the product and the brand is readily available on search engines if you want to hide your identity.
VPN apps are often used to protect data transmissions on mobile devices. They can also be used to visit websites that are restricted by location. Secure access through a mobile VPN should not be confused with private browsing, however. Private browsing does not involve encryption you can use diebestenvpn to ensure you are being tracked; it is simply an optional browser setting that prevents identifiable user data from being collected.
Follow TodayTechnology for more!